Top Rated Tile Repair & Replacement Services Near New Port Richey
|
|

|

|

|
|

|


Residential & Commercial Floor, Wall, Backsplash Tile Repair & Replacement Services New Port Richey
HandyPro is a reliable and professional handyman company that specializes in tile replacement and repair services for both residential and commercial properties in New Port Richey, FL, and the surrounding areas. With years of experience in the industry, our team of skilled technicians is committed to providing high-quality services that meet the unique needs of our clients. We understand that damaged or worn-out tiles can be an eyesore and a safety hazard, which is why we strive to deliver prompt and efficient services that restore the beauty and functionality of your tiles. From minor tile repairs to complete tile replacement, we have the expertise and tools needed to handle any project, big or small. Whether you need tile replacement or repair services for your home or business, you can count on HandyPro to provide you with the best solutions that meet your needs and budget. Contact us today to schedule an appointment and get your tiles looking as good as new!
Most Common Types of Tile Repair & Replacement Requests We Receive
Grout Repair: Grout is the material used to fill the gaps between tiles. Over time, grout can crack, crumble, or become discolored. A handyman can remove the old grout and replace it with fresh grout, improving the appearance and durability of the tiled area.
Tile repair and replacement projects are common requests for homeowners and businesses looking to hire a handyman in New Port Richey, FL. Tiles are used in various parts of the house, including floors, walls, backsplashes, and countertops, and they can become damaged over time due to wear and tear, water damage, or accidents. Here are some of the most commonly requested tile repair and replacement projects:
Cracked Tiles: Cracks in tiles can occur due to heavy objects falling on them, improper installation, or changes in temperature. Cracks can be unsightly and can also be dangerous, especially if they are sharp. A handyman can replace cracked tiles and make sure they are properly installed and grouted.
Loose Tiles: Loose tiles can be caused by inadequate adhesive, movement in the subfloor, or grout deterioration. Loose tiles can be a tripping hazard and can also lead to further damage if left unrepaired. A handyman can remove the loose tile, clean the area, and reinstall it with the proper adhesive.
Water Damage: Tiles in areas exposed to water, such as bathrooms and kitchens, can become damaged over time due to water absorption. Water damage can cause tiles to crack, warp, or discolor. A handyman can replace the damaged tiles and also identify and fix the source of the water damage.
Tile Backsplash Installation: Tile backsplashes are a popular way to add color and texture to a kitchen or bathroom. A handyman can install a tile backsplash, ensuring that it is properly measured, cut, and installed.
Countertop Tile Replacement: Kitchen and bathroom countertops can also be tiled. If the tiles on a countertop become damaged or dated, a handyman can replace them with new tiles, giving the countertop a fresh and updated look.
In conclusion, tile repair and replacement projects are common requests for homeowners and businesses in New Port Richey, FL. A handyman can help with all types of tile-related projects, from repairing cracks and loose tiles to installing new tile backsplashes and countertops. Hiring a handyman for these tasks can save time and money and ensure that the job is done correctly.
The Tile Repair & Replacement Process Step By Step
This is the process our New Port Richey tile experts follow when repairing or replacing floor or wall tiles.
Step 1: Assess The Damage
The first step is to assess the damage to the tile. Look for any cracks, chips, or loose tiles, and determine whether the tile needs to be repaired or replaced.
Step 2: Remove The Damaged Tile
If the tile is damaged beyond repair, it needs to be removed. Use a chisel and hammer to remove the damaged tile carefully. Be careful not to damage the surrounding tiles.
Step 3: Prepare The Surface
Once the tile is removed, prepare the surface by removing any adhesive or debris. You can use a putty knife or scraper to remove any leftover adhesive.
Step 4: Cut The Replacement Tile
If you are replacing a tile, you will need to cut the new tile to fit the space. Use a tile cutter or a wet saw to cut the tile to the correct size.
Step 5: Apply Adhesive
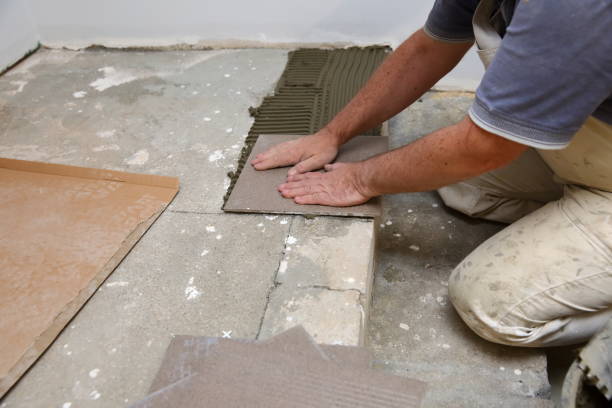
Before installing the new tile, apply adhesive to the back of the tile and to the surface where the tile will be placed.
Step 6: Install The New Tile
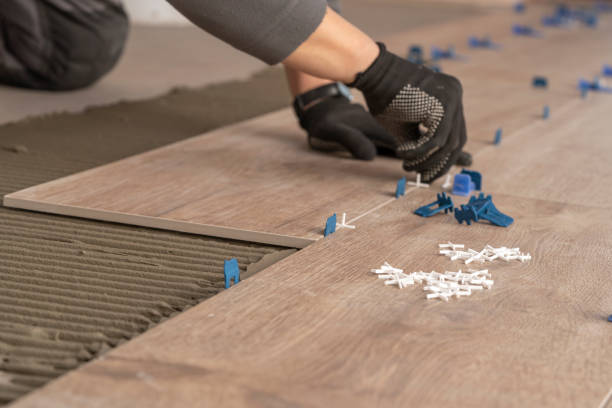
Place the new tile in the correct location, making sure it is level and flush with the surrounding tiles. Use spacers to keep the tiles evenly spaced.
Step 7: Grout The Tile
Once the tile is in place, use a grout float to apply grout to the gaps between the tiles. Make sure to remove any excess grout with a sponge.
Step 8: Clean The Surface
After the grout has dried, clean the surface of the tiles with a damp cloth or sponge. Allow the tiles to dry completely before walking on them.
By following these steps, you can repair or replace a damaged tile and restore your floor or wall to its former beauty.
Step 1: Assess The Damage
The first step is to assess the damage to the tile. Look for any cracks, chips, or loose tiles, and determine whether the tile needs to be repaired or replaced.
Step 2: Remove The Damaged Tile
If the tile is damaged beyond repair, it needs to be removed. Use a chisel and hammer to remove the damaged tile carefully. Be careful not to damage the surrounding tiles.
Step 3: Prepare The Surface
Once the tile is removed, prepare the surface by removing any adhesive or debris. You can use a putty knife or scraper to remove any leftover adhesive.
Step 4: Cut The Replacement Tile
If you are replacing a tile, you will need to cut the new tile to fit the space. Use a tile cutter or a wet saw to cut the tile to the correct size.
Step 5: Apply Adhesive
Before installing the new tile, apply adhesive to the back of the tile and to the surface where the tile will be placed.
Step 6: Install The New Tile
Place the new tile in the correct location, making sure it is level and flush with the surrounding tiles. Use spacers to keep the tiles evenly spaced.
Step 7: Grout The Tile
Once the tile is in place, use a grout float to apply grout to the gaps between the tiles. Make sure to remove any excess grout with a sponge.
Step 8: Clean The Surface
After the grout has dried, clean the surface of the tiles with a damp cloth or sponge. Allow the tiles to dry completely before walking on them.
By following these steps, you can repair or replace a damaged tile and restore your floor or wall to its former beauty.